Guide - Written by Ahmer Tahir
How To Claim Free AWS Server For 1 Year

Introduction
In this tutorial you will learn how to claim Free AWS server for 1 year. AWS Server that we will claim is a VPS but in AWS we call it EC2 or Instance. AWS provides 1 Year Free Tier for all new signups on their platform. Must read the prerequisites section.
AWS aka Amazon Web Services is the cloud computing services provider with Reliable, scaleable and inexpensive features. AWS is the best choice when it comes to computing power because big platforms like Twitch use AWS for their streaming services.
This guide does not contain information regarding how to use the key pair SSH Login method but the guide is available on the Create EC2 Instance page of AWS.
Prerequisites
Here is what you should Know before using free AWS:
- AWS provides 1 Free Tier EC2 Server
- Free Tier is only valid for 1 Year
- You can create only 1 Instance in free tier
- Free Tier has only 2 cores, 1GB RAM & 100GB/Month Bandwidth
- Select region where you want to create your Instance
- Credit Card is required for verification. 1$ will be deducted then you will get it in 3 days
- Only create instances with free tier otherwise you will have to pay for the service
- You will be given a private and public key that you will use for SSH Login
- Always Setup Elastic IP for more robust Firewall Configuration
- If you create Elastic IP for instance then you will be provided with New IP Addresses
- Instance/EC2 can be terminated (deleted) and recreated anytime
Recommendations:
Here are some recommendations that may help you manage your server:
- Other than EC2, you can have a lot of other Free Tier services
- Always configure Firewall (UFW) on OS and Firewall of AWS like allowing ports
- Always Allow Port 22 To Open in OS Firewall for SSH Access
- Free OS like Debian, Ubuntu, Amazon e.t.c will be available
- You can use it either for practicing Linux or deploying projects
- Teamspeak Server, VPN services can also be created.
- If you are using a Paid EC2 instance, terminate it completely so it will not cost you anything. This one is Free that i’ll show you.
Step To Follow:
We will follow these steps to setup the server without any issue:
Step 1 — Create AWS Account
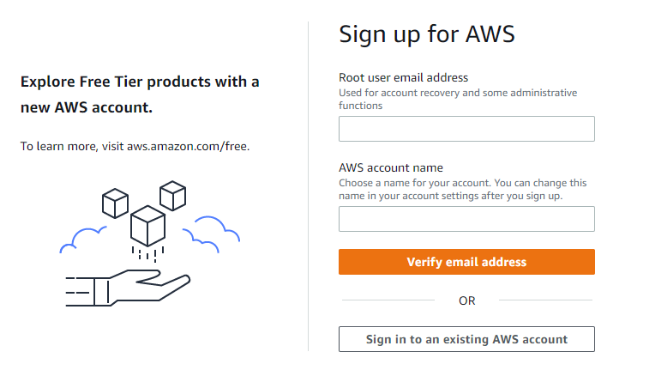
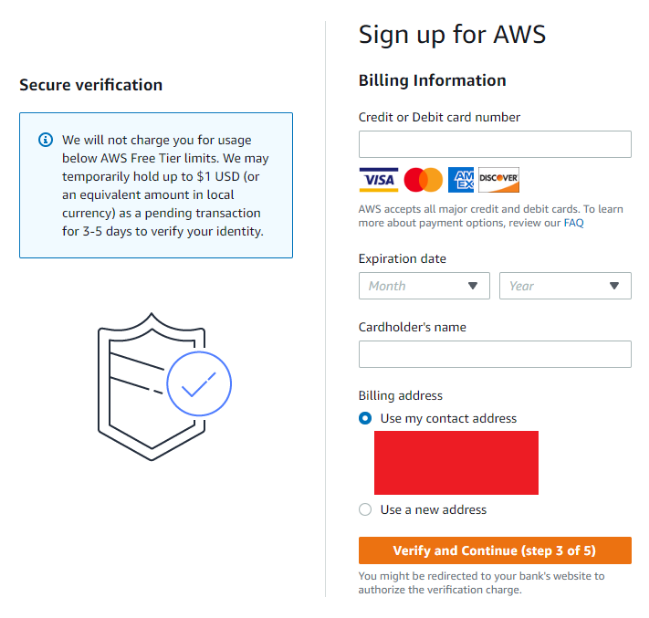
The first thing we have to do is create an AWS Account. It is as simple as email, address, mobile and Credit Card verification. You will be charged 1$ for the authenticity of your account then you will get the refund after 3-5 days.
Root user email address you will use for login into AWS and AWS Account name can be any name you want.
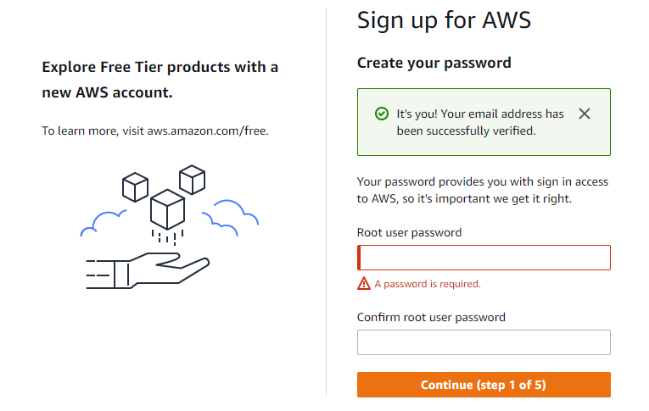
After email verification, now you have to provide the password you want for your account. Please make sure the password is 8+ characters mixed with alphabets, numbers & symbols.
You will have to provide an address and mobile number for further verification.
After email verification, you now have to verify your identity with a credit card. You can use cards in the image below. Like I said, AWS will charge 1$ but it will be refunded in 3-4 days. Then you will be charged after 1 year if you use the Free Tier of AWS. After verifying with a credit card you will have to verify your mobile number.
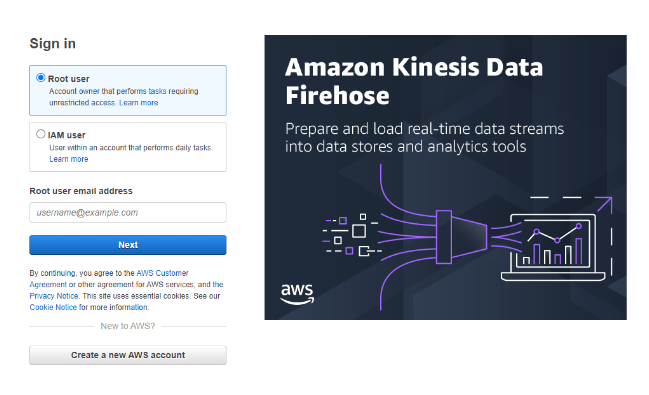
Step 2 — Login AWS Root Account
Now you have to login to your account using the Root User credentials. Other users are for those who have authorized the access of the root account.
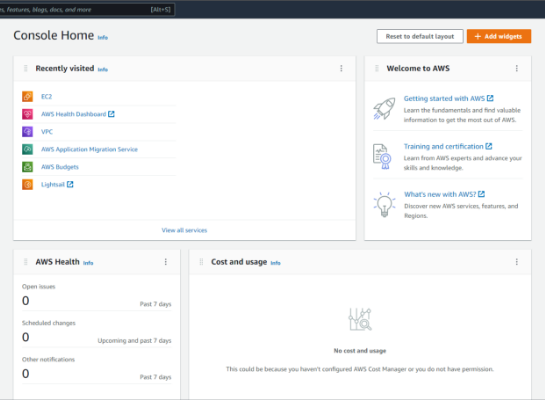
After successful login you will be prompted with this Dashboard Page. Here you can see your Recently Visited Pages and In my case I visited EC2 recently so you will have to do the same.
Step 3 — Instance Region
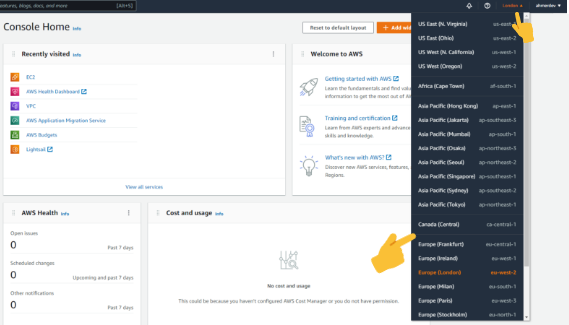
First, you have to select the region where you want to create your EC2 Instance/VPS. Remember, you can not use multiple Regions at once. You can use only 1 region for 1 EC2 Instance only.
Click The Button on the left side of your username in the Navigation bar on top left. You will see the same thing like in the image below. You have to select one region, that's it.
Step 4 — Create EC2 Instance
This is the most important step. Simply scroll down in the Dashboard Page to Build a solution section and click Launch a virtual machine. There are other services you can also take.
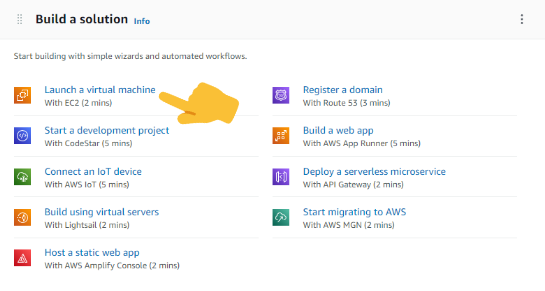
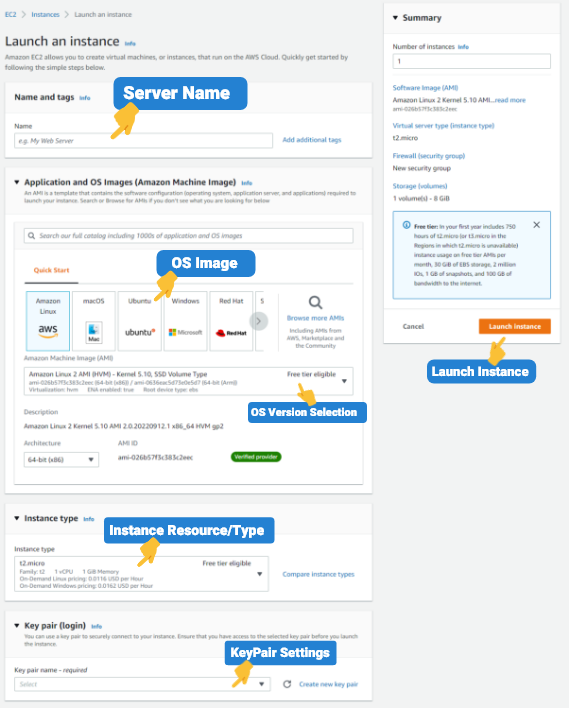
After this, you will land on this launch instance page. This is the last step, after this, your Virtual Machine / EC2 Instance will be created. Here you will perform the following tasks:
- Name your server
- Select OS Image for Instance (Ubuntu)
- Select OS type (Ubuntu 20.04 or Ubuntu 22.04)
- Instance types / resources (Select Free)
- Create & Save Key Pair for Login
- Launch Instance
That’s it. You can Browse more AMIs for more OS images. There will be free and paid. Remember, choose Free Tier OS Image otherwise AWS will charge you for it. You will find more options below but they don’t matter as much as those i mentioned above.